You Will Need Preformed pond liner or big black plastic bin out of home improvement center (we used one from the concrete supplies segment that was less than $15) / a level / drama sand / one 3/4-inch x 10-inch galvanized pipe / one 3/4-inch x 6-inch galvanized pipe / one 3/4-inch galvanized connector / one 3/4-inch galvanized T / 1 3/4-inch galvanized floor flange / one 3/4-inch close inch / timber screws / galvanized bucket / drill plus 1 1/8-inch drill bit / pliers (optional) / concrete / rebar / painter's tape / 6-inch x 12-inch pressure-treated timber / fountain pump / pump tubing / scissors or utility knife / spraying fountain head / water-tolerant plant or aquatic pond plant (we used horsetail grass) / grassy plants / other low-growing plants for comparison / dirt / rocks for landscaping the pond (we used flagstone)

Plan Out Your Water Feature Draw out your general design, without worrying too much about your artistic ability. The drawing is for your eyes only and simply used to assist you determine the general layout and also to plan purchases. Next, list the items you will need and make sure they fit in your budget. If you want your water feature to be seen, be sure that you put it in a prominent place where it stands out among neighboring landscaping. You can also think about setting it apart somehow by outlining it with landscaping stones or building a route that leads to it. Recall that water is often tempting to small children, so make sure they are always supervised when playing near your water feature. Also make sure your water feature is fenced-in and not accessible to passerby and inquisitive children who may want to explore unsupervised.

Choosing a Pump There are a variety of pumps available. Pick one that will pump enough water for your project. For a small water place, a 120-gallon-per-hour pump should be sufficient. Consider one with spraying attachments included or readily attainable.

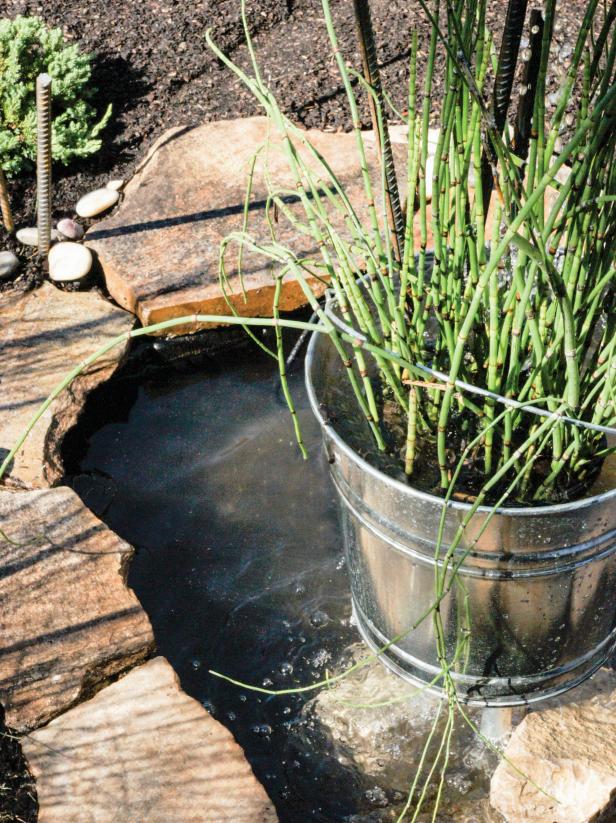
Choosing Rocks and Stones The rocks are an important part of the design and critical around the pond edge to disguise the top of this black basin. We selected flagstone to cover the edge, but you could use another selection. Have enough and incorporate the rocks or rock into the surrounding landscaping to put in a natural component.

Choosing Plants We chose grassy plants to perform up the rebar and solidify the plan idea. Choose plants which are to your liking. Many who make water features like the notion of including plants. There are some terrific varieties to select from, but remember that incorporating aquatic plants into the pond could require you to wash it more often.

Prepare the Area After you've chosen your place, be sure that it is safe to dig. Not only are you going to have to dig out the place at which the basin will lay, however you will need a trench to hide the power cable. If possible, plan your water feature near a patio or deck so an outlet will be nearby. This will also permit the relaxing sound of the water feature to be heard from places you will almost certainly be.

Create an Outline Whenever you're ready to dig, flip the pouch upside down and place it in the desirable location. Mark the outline with a hose, rope, powdered chalk or flour.

Start Digging Remove the basin and dig the spot deep enough for the basin to sit down comfortably. It ought to be the thickness of your own bowl or preformed pond, and only a bit more. Don't be worried if it's a touch too deep--you will fill in any gaps with all the displaced dirt. Make sure you keep it as level as you can.

Make Sure It's Level Turn the basin or preformed pond into the hole and check that it is level.

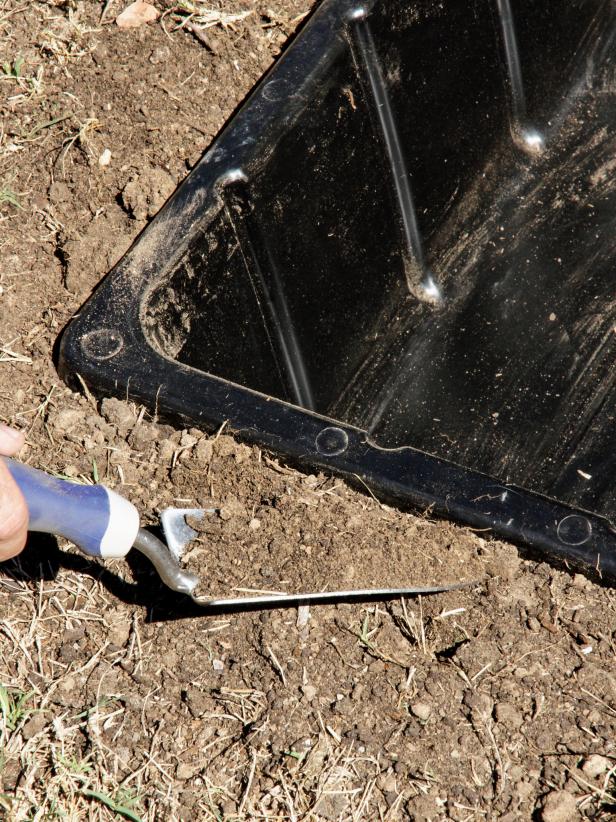
Insert Play Sand Determine where adjustments are necessary, eliminate basin and apply a coating of play sand.

Make Adjustments and Fill In Add additional sand where the alterations are required and level the surface. Re-install the basin or preformed pond and then check for levelness again. Make any additional adjustments with sand as necessary. Fill in any gaps with homeless soil and pack closely.
Create the Bucket Fountain Drill a hole in the base of the galvanized bucket with a 1 1/8-inch drill bit (ours is slightly off centre to accommodate the plant container we used). If it rips up the bottom a bit, simply break off the ragged pieces with a set of pliers.

Attach the Pipe Attach the 6-inch pipe to the 10-inch pipe utilizing the connector. Insert the pipe into pit with the 10-inch tubing and connector on the surface of the bucket.

Secure With Duct Tape Use duct tape (you're remove it later) to fasten the connector firmly to the bottom of the bucket.

Produce a Stand Set the bucket and pipe something which will allow the pipe to hang freely along with the bucket to be level.

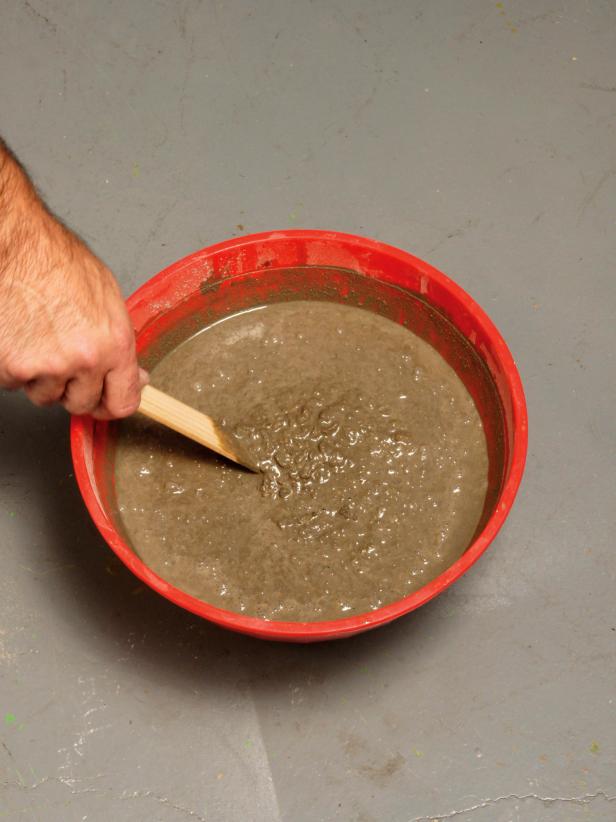
Mix Concrete Mix up enough concrete to fill about 3 inches at the bottom of the bucket.
Add Concrete to Bucket Add the concrete to the bucket and add rebar into the cement at varying heights and angles.

Secure Rebar Use painter's tape to fasten them in place while the concrete hardens. After the concrete has hardened, remove the painter's tape and the duct tape.

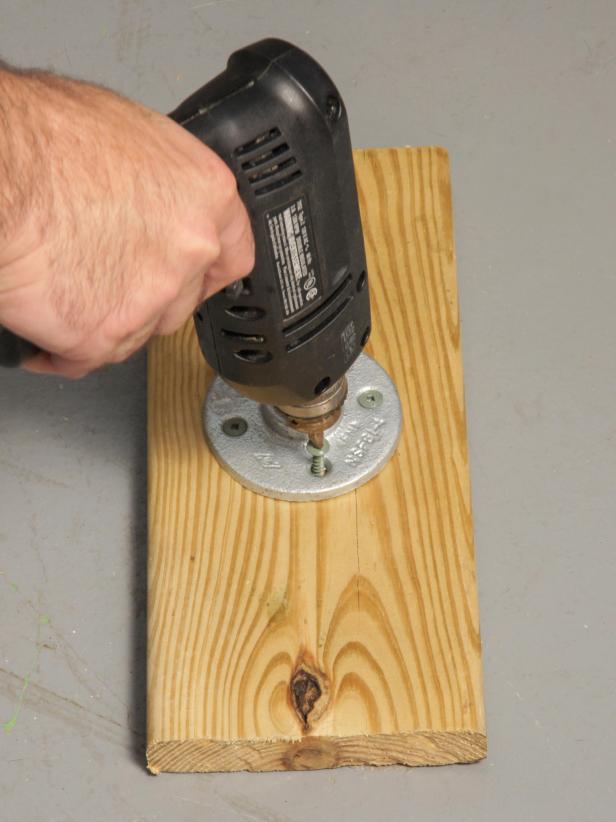
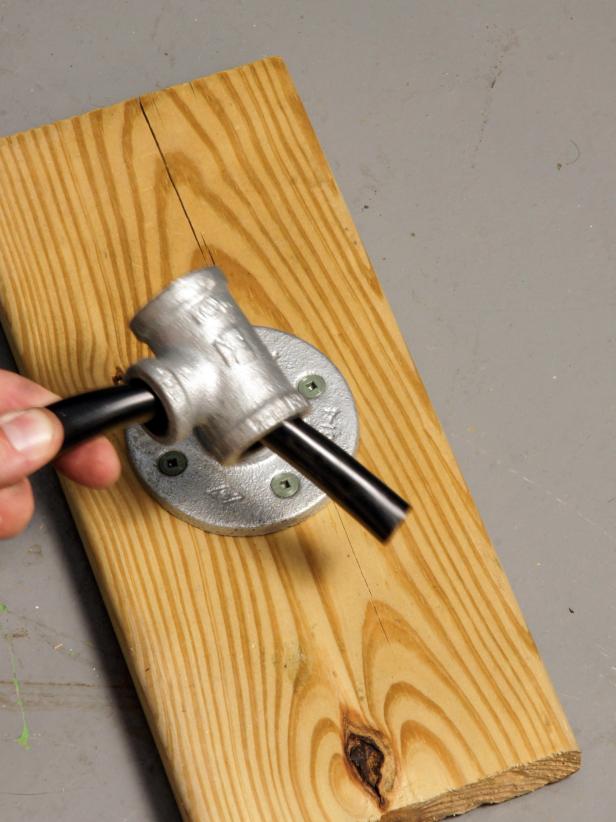
Create a Base for your Bucket Attach the ground flange into the piece of wood with wood screws.
Making the Base Insert the close nipple into the floor flange.

Insert Vacuum Tubing Insert flexible pump tubing to the side part of this galvanized T and via one of the other openings.
Adding the Tubing The tube should be approximately 18 inches long plus the length required from the fountain to the pump. Continue feeding the tube through the tube at the galvanized bucket till it comes out of the top of this 6-inch pipe.

Attach the Base into the Bucket Twist the galvanized T on the bottom of the 10-inch pipe and connect the opposite end of the T to the close nipple and floor flange.

Fill the Basin and Test Fill the basin with water and submerge the fountain base. Put a couple of thick stones on the timber base for stability. Connect the flexible tubing into the pump and submerge the pump. Insert the spraying jar head to the tube within the bucket. Fill the bucket with water and then test the pump to be sure it works.

Finishing Touches The accession of stones gives your water feature a natural appearance. Use them to include height in regions that require it and to disguise the border of your own bowl or preformed pond liner. Cover the entire area with top soil. Fill in and lightly package where necessary. Fill in the trench, burying the power cable.

Landscape the Area That is where things get interesting. The best way to decorate and design your water feature region is a private choice, obviously. To make this look, We've taken a more environmentally friendly and sculptural approach. Place the water plant you have selected into the bucket (if using horsetail grass, leave the plant in its container). Add plants round the water area. Use mounds of soil of varying heights to generate interest. Choose a couple varieties of plant life that comparison concerning texture, shape and size. Recall that water can be tempting to little children, so be certain that they are always supervised when playing close to your water feature. Also make sure that your water feature is fenced-in and not accessible to passerby and curious kids who may want to explore unsupervised.

No comments:
Post a Comment